Fossil Ornament
Materials
- Air-dry clay or play dough, ½ oz. per student
- Small plastic fish or animals, sea shells, plastic leaves, etc.
- Ribbon or yarn cut into 8-inch lengths
- One sheet of wax paper for each student
Instructions
Pass out a sheet of wax paper to each student. Write the student’s name on the paper. Divide the clay or play dough into ½ oz. portions for each student.
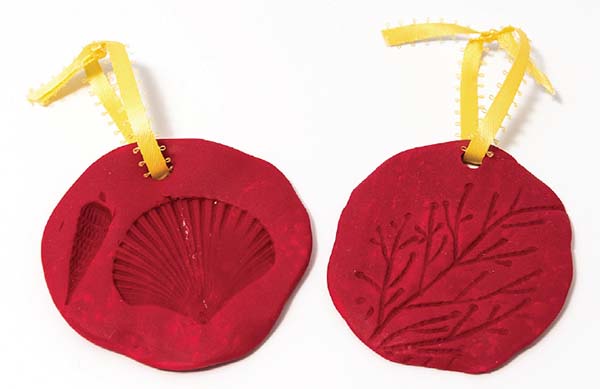
Have students roll the clay into a ball then flatten it to the size of a cookie on the wax paper sheet. Have students press a plastic fish, animal, or other object into the clay and remove carefully. (If the impression is not very good, have the student roll the clay in a ball and start over again.)
Use a pencil to poke a hole near the top. Gently run a length of ribbon or yarn through the hole and tie a loop.
Allow the clay to dry for several days before hanging.
Suggested Discussion
Fossils are formed when an animal or plant is quickly buried in mud! We know that the worldwide Flood would have created a lot of mud that would form fossils. When the water came from above and below the earth, it came very suddenly. Many animals and plants were buried immediately, and many of these turned into fossils, which we can dig up today.